Ellen Editorial Team
Introduction
Remodeling a kitchen is an exciting way to improve your home’s appearance, comfort, and functionality. However, a kitchen renovation involves several tasks, and completing them in the wrong order can lead to delays, extra expenses, and unnecessary work.
Whether you are updating a small kitchen or planning a complete renovation, having a clear plan makes the process much easier. From setting a budget and choosing a layout to installing cabinets, countertops, and appliances, every stage should follow a logical sequence.
In this guide, you will learn how to plan a kitchen remodel in the right order so you can organize your project and avoid common renovation mistakes.
1. Decide What You Want to Change
Before starting any work, think about what you dislike about your current kitchen.
Perhaps you need more storage, better lighting, additional counter space, or a more practical layout. You may also want to replace old cabinets, upgrade appliances, or create a modern appearance.
Make a list of your main goals and separate essential improvements from decorative changes.
For example, improving a poorly designed layout may be more important than purchasing expensive decorative accessories.
2. Set Your Kitchen Remodeling Budget
Your budget will determine the materials, appliances, and improvements you can afford.
Before purchasing anything, estimate the costs of:
- Cabinets and hardware
- Countertops
- Flooring
- Lighting
- Appliances
- Plumbing and electrical work
- Installation and labor
- Painting and finishing
Keep some additional money available for unexpected problems. Older kitchens may have hidden plumbing, electrical, or water damage that becomes visible during renovation.
Getting estimates from different suppliers and contractors can also help you make better financial decisions.
3. Measure Your Kitchen Space
Accurate measurements are essential before choosing cabinets, appliances, or countertops.
Measure the kitchen walls, ceiling height, windows, doors, and existing plumbing connections. Record the location of electrical outlets, switches, water pipes, and ventilation points.
These measurements will help you select suitable cabinets and appliances without creating installation problems.
If you are planning major layout changes, consider asking a kitchen designer or contractor to prepare a detailed floor plan.
4. Choose the Right Kitchen Layout
The kitchen layout determines how comfortably you can move between the sink, stove, refrigerator, and preparation areas.
Common kitchen layouts include:
- L-shaped kitchen: Uses two connected walls and works well in many homes.
- U-shaped kitchen: Provides plenty of counter space and storage.
- Galley kitchen: Uses two parallel counters and is suitable for narrow spaces.
- One-wall kitchen: Places cabinets and appliances along a single wall.
- Island kitchen: Adds extra workspace and can provide seating.
Choose a layout that matches your available space and daily cooking habits. Make sure there is enough room for opening cabinets, appliances, and walking paths.
5. Select Cabinets and Storage Solutions
Cabinets are among the most important parts of a kitchen remodel because they influence both appearance and functionality.
Choose cabinet styles, colors, materials, and finishes that match your overall design.
Think about how you use your kitchen when planning storage. Deep drawers, pull-out organizers, corner storage, and pantry cabinets can help keep everyday items organized.
Finalize cabinet measurements and placement before ordering. Incorrect dimensions can create expensive installation problems later.
6. Plan Plumbing and Electrical Work
Plumbing and electrical work should be planned before walls are closed and cabinets or other fixtures are installed.
If you are moving the sink, dishwasher, refrigerator water connection, or cooking area, determine the necessary plumbing changes early.
Electrical planning should include outlets, appliance connections, lighting switches, and any additional circuits required for new equipment.
Always use qualified professionals for electrical and major plumbing work. Check applicable local building requirements before beginning.
7. Order Materials and Appliances
Once the layout and measurements are finalized, start selecting and ordering the materials needed for the project.
This may include cabinets, flooring, countertops, sinks, faucets, lighting fixtures, and appliances.
Check product dimensions, installation requirements, delivery dates, and warranties before confirming purchases.
Ordering important items early can help prevent delays, especially when cabinets or appliances have longer delivery times.
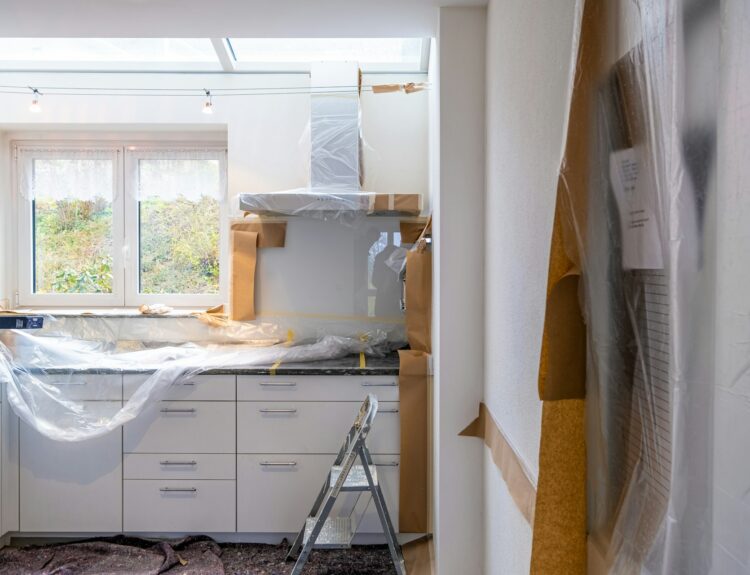
8. Prepare the Kitchen for Renovation
Before construction begins, remove food, dishes, small appliances, furniture, and other personal belongings from the work area.
Protect nearby rooms from dust and debris. If you are renovating the entire kitchen, create a temporary cooking area somewhere else in the home.
Make sure contractors have safe access to the work area and that children and pets stay away from construction zones.
Good preparation makes the renovation safer and more organized.
9. Complete Demolition and Removal
The next stage is removing old materials and fixtures that will not be reused.
Depending on your project, this may include:
- Old cabinets
- Countertops
- Flooring
- Backsplash tiles
- Outdated appliances
- Damaged fixtures
Before removing walls or making structural changes, confirm that the work is safe and properly approved.
Dispose of construction waste responsibly and inspect the exposed areas for hidden damage before continuing.
10. Complete Structural, Plumbing, and Electrical Work
After demolition, complete any necessary structural repairs and rough plumbing and electrical installations.
This is the stage when contractors prepare the space for the new kitchen layout.
If you are changing the location of a sink, dishwasher, stove, or other appliances, the required connections should be installed now.
Have the relevant work inspected where required before covering walls or moving to the next stage.
11. Install Flooring and Cabinets
The installation sequence for flooring and cabinets depends on the flooring material, cabinet design, and manufacturer’s instructions.
In many full kitchen renovations, flooring is installed before cabinets. However, some installations place cabinets first, especially with certain floating floor systems.
Follow the recommendations of your flooring and cabinet installers to avoid movement, moisture, or warranty problems.
Once the required preparation is complete, install and level the cabinets carefully. Proper alignment is important for doors, drawers, countertops, and appliances.
12. Install Countertops and Backsplash
After cabinets are installed and secured, the countertop can be measured and fitted.
Countertops need accurate measurements, especially around sinks, cooktops, and corners.
Once the countertop installation is complete, the backsplash can be installed. Choose tiles or other suitable materials that complement the cabinets and countertop.
Seal joints where necessary and follow the product instructions to protect the finished surfaces.
13. Install Appliances, Fixtures, and Lighting
Now it is time to bring the main kitchen equipment and fixtures into place.
Install appliances such as the refrigerator, oven, dishwasher, and cooktop according to their specifications.
Fit the sink, faucet, cabinet handles, light fixtures, and other accessories.
Make sure all plumbing and electrical connections are completed and tested by qualified professionals.
Good lighting should include general illumination and task lighting for areas such as countertops and food preparation spaces.
14. Paint, Finish, and Clean the Kitchen
The final stage focuses on completing the appearance of your renovated kitchen.
Touch up wall paint, finish trim, adjust cabinet doors, and check that all hardware is secure.
Clean countertops, cabinets, floors, windows, and appliances. Remove leftover materials and construction waste.
Take your time with the finishing details because small improvements can make the entire kitchen look more polished.
15. Inspect Everything Before Using the Kitchen
Before considering the project complete, inspect the kitchen carefully.
Check that:
- Cabinet doors and drawers open smoothly.
- Countertops are properly fitted.
- Faucets and drains do not leak.
- Appliances operate correctly.
- Electrical outlets and lighting work.
- Flooring is secure and properly finished.
- Backsplash and wall surfaces look complete.
Ask the contractor to correct any unfinished work covered by your agreement.
Keep receipts, warranties, and installation documents in a safe place.
Common Kitchen Remodeling Mistakes to Avoid
A well-planned kitchen renovation can still become stressful if important details are overlooked.
Here are some mistakes worth avoiding:
Starting without a clear budget: Unexpected expenses can quickly increase renovation costs.
Ignoring the kitchen layout: A beautiful kitchen may still be inconvenient if the main work areas are poorly arranged.
Ordering cabinets before measuring: Incorrect measurements can lead to installation delays and additional expenses.
Choosing materials only for appearance: Consider durability, cleaning requirements, and everyday use.
Changing plans during construction: Frequent design changes can increase labor costs and extend the project timeline.
Forgetting ventilation and lighting: Proper ventilation and suitable lighting are essential for a comfortable kitchen.
Conclusion
Planning a kitchen remodel in the right order helps make the renovation more organized and less stressful. Start by identifying your goals, setting a budget, measuring the space, and choosing a suitable layout.
Next, finalize cabinets and materials, prepare the kitchen, complete demolition, and arrange structural, plumbing, and electrical work. After that, follow the appropriate installation sequence for flooring, cabinets, countertops, backsplash, appliances, and lighting.
Finally, inspect every detail before using your renovated kitchen. With careful planning and the right professionals, you can create a kitchen that is attractive, practical, and comfortable for everyday living.